
Have you ever heard of wagon or stroller costumes? Before last year I had never heard of them but I have to say that they make a lot of sense. When your little one is too small to walk around the neighborhood on their own, their costumes kind of get swallowed up by the stroller they are ridding in. So why not turn their wagon or stroller into a costume and plop them inside?
Since Henry is more aware of what is going on this year I figured I should make a costume that he would like. It wasn’t too hard to think of a theme. Henry LOVES cars!

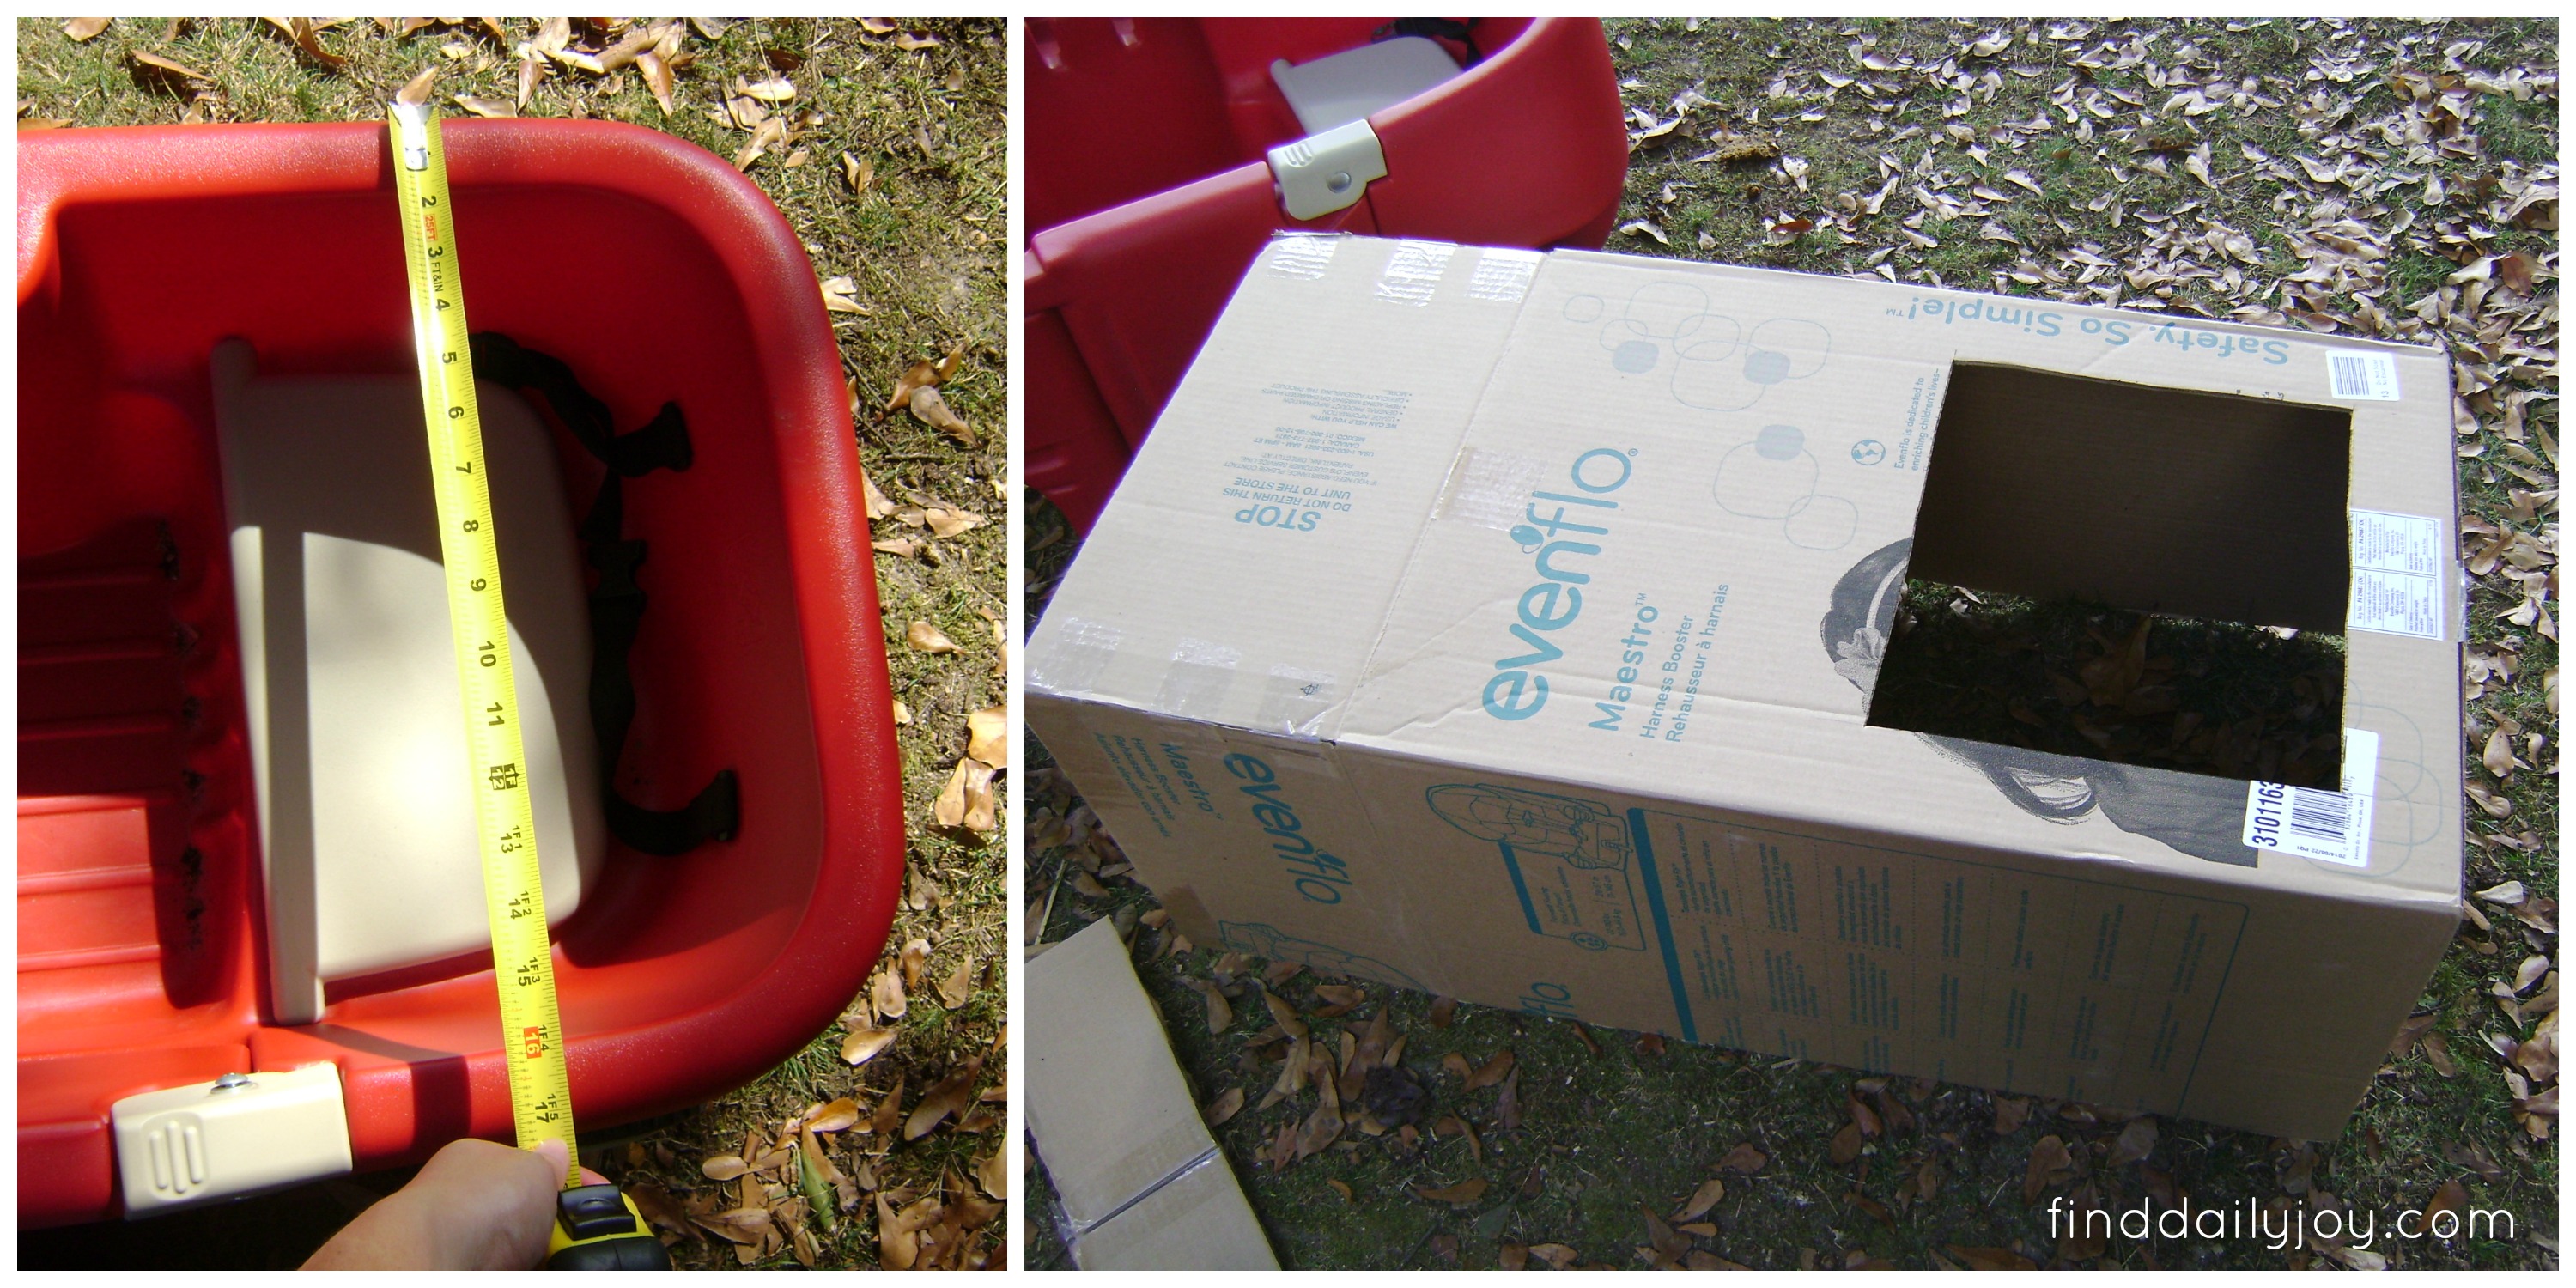
Are you thinking of making a stroller or wagon costume this year? It really was quite easy and cheap! In fact I already had a large box in my garage that was just the right size for my wagon! I started out by measuring the height of the wagon then subtracted a few inches so the box wouldn’t drag on the ground. Then using that measurement I cut off one side of the box.
What was once the bottom of the box (still taped closed) will be at the back of the wagon and what was once the top of the box will be at the front of the wagon. The next step was to measure the width of the wagon and figure out how big of a hole I needed to make in the top of the box for Henry to fit inside. I ended up leaving a 3″ border around the sides and back of the opening so the box would easily rest on the top edges of the wagon. The opening is 12″ from the front to back (relative to how Henry will sit in the opening) and should give him plenty of wiggle room.
To keep the box from sliding off the wagon I wrapped the top and sides around the front of the wagon and taped them in place. I also cut out a portion of the sides so the wheels had more room to turn from side to side.
Using a scrap of cardboard I cut out a strip that will be the windshield and will wrap around the front of Henry’s seat. I didn’t tape the windshield to the car at this point; just set it on top to determine the size of the windshield.
Time to paint the car! White probably wouldn’t have been my first choice (it took 4 coats to cover the words on the box!) but someone had given us 6 cans of white spray paint so I decided to use them up.

Once the paint dried the real fun began! I enjoyed adding all of the little details to the car and was like a giddy little school girl when I showed off the car to Stephen. 🙂
The back of the car has a trunk that I drew on with a black permanent marker. The tail lights are red construction paper glued to the box. And the license plate is blue construction paper with permanent marker letters. You will notice that there is no steering wheel. I want to add one but haven’t come up with anything that can turn and won’t easily rip off when Henry tries to play with it. Any ides?
Moving around to the side you can see the door I drew on with marker and the wheels. For the wheels I used black construction paper and aluminum foil. I think the side mirrors are so fun. I sandwiched a thin piece of cardboard between a layer of black construction paper and a layer of aluminum foil. The mirrors are circles with a tab that I slid into a slit in the window and secured to the inside of the window with tape.

The front of the car has my favorite feature. Just think of how cool it will be to cruse around the dark neighborhood with some bright headlights leading the way! Yep, those lights really do light up. The small, battery operated, touch lights are the only items I had to buy specifically for our Halloween costumes. I was pretty excited to find them for a dollar each at Dollar General. I used a crazy amount of packing tape to attach the lights to the car and I hope they stay on the entire night. The front of the car also sports a few more drawn on details like the hood, the windshield wipers and the logo (Stephen’s special request).

Now I couldn’t just stop with the car. I had to make some simple costumes for Stephen and I to join in the fun! By cutting out some construction paper circles and attaching them to a black shirt with safety pins; Stephen will be a stoplight.
Even baby #2 is going to dress up this Halloween! It will be the bump in the road. Ha! My corny little jokes always crack me up. 🙂 Bet you can guess what I used to make the road sign and yellow dashed line……yep, more construction paper and permanent marker.
Are you dressing up for Halloween this year? Are you making costumes?

Let’s get together!
I’ll be linking up to some of these amazing site listed here.

I cant wait to see pics of Henry in his car! So clever!
Sent from my iPhone
>
Thanks, I’ll certainly post pics of him riding around. I can’t wait for him to see the car. Every time I worked on it he was sleeping and it is now hiding in the garage.