
Yesterday I shared my son’s first birthday party. The theme was “first trip around the sun” and you can see more pictures here. I made most of the decorations myself and I wanted to share with you how I did some of these projects.

Today I am going to share with you how to make your own cupcake stand. This project is supper easy and since the cupcake stand I saw in the store was $30 this saved me some major moolah. Here is what you’ll need to make your own.

Let’s get going!

- Tie a piece of string around your pencil near the end the writing end. Then measure the string 6″ out from the pencil and cut the string.
- Holding the free end of the string down on the foam board and pulling the pencil to the full length of the string draw a circle (sorry it is hard to see the circle in the picture). This first circle will be 12″ across. Next measure the string, cut it at 5″ and repeat the process to create a 10″ circle. For the third circle measure your string and cut it at 4″ to create a 8″ circle.
- Use an exacto knife to cut out the three circles.
- Glue ribbon around the edges of your three circles. I used curling ribbon since that is what I had on hand and I use rubber cement to glue it to the foam. You could also use a larger fabric ribbon that would have a little more visual impact. If you use a ribbon that won’t melt you can glue it on with a glue gun.

- It is now time to make the riser in between the foam circles. Measure the height of your can. For the base I used a short and squatty can of chicken and for the other two layers I used taller and more slender cans of diced tomatoes.
- Using the height of your can, measure and make a line along the longest side of your card stock. Then cut along the line to make a long strip of paper.
- Tape one end of the card stock to your can, wrap the card stock around the rest of your can to completely cover the label then tape the other end of your card stock down.
- Using your glue gun, glue the layers of foam circles and cans together just like you see in the picture below.

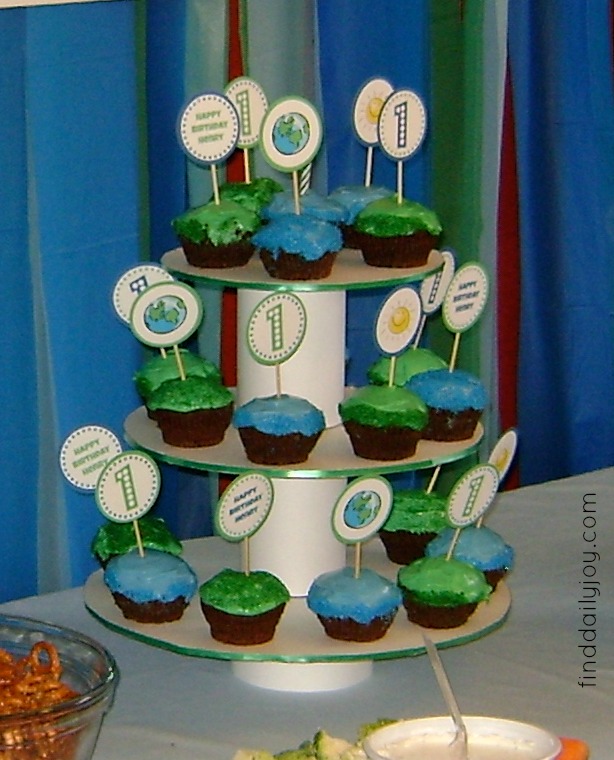
Now load up your cupcake stand with delicious goodness and enjoy!

